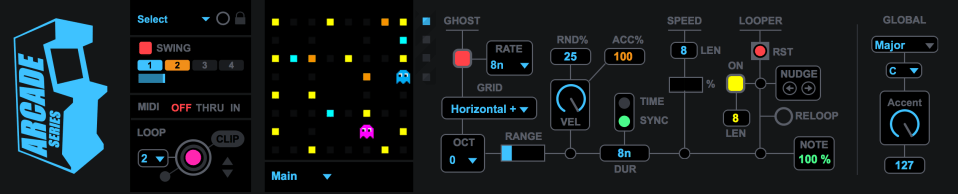
Arpex is an MPE enabled arpeggiator device built in Max for Live for Ableton Live 11. It uses slide and pressure to control octave shifts and note length. Using MPE control data to change how each note is generated by the arpeggiator offers new melodic possibilities.
To celebrate the launch of Ableton Live 11, Arpex is available for free until 23rd March 2021.
Download Arpex from: Isotonik Studios
Download the full user manual: Arpex – User Manual
Live 11 and MPE
Arpex makes use of a new feature in Live 11, MIDI Polyphonic Expression (MPE). Where regular MIDI limits a single channel of control data for an instrument meaning that pitch bend or pressure effects the entire instrument, MPE allows each note to have its own MIDI channel. This means we can apply pitch bend, slide and pressure on a per-note basis (up to 15 notes).
From a sound design perspective, MPE enabled instruments and controllers present exciting new ways to interact with and modify sound. For example, holding a chord and applying more pressure to a single key might open that specific note’s filter up. Live 11 now comes with some excellent MPE enabled instruments (Wavetable and Sampler) and providing you have an MPE controller (see list at the end of this page) you can dive straight into the exciting world of MPE.
MPE functionality is also extended to Max for Live via a range of special MPE objects meaning we can now create our own MPE enabled devices.
System Requirements
Arpex requires Ableton Live 11 and a version of Max for Live will also be needed either with Ableton Live 11 Suite or Ableton Live 11 Standard with the Max for Live extension. The MPE functionality in Arpex will have no effect if used in any previous versions of Ableton Live.
To take full advantage of Arpex’s design, an MPE controller is needed such has the Sensel Morph or Roli Seaboard.
How does it work?
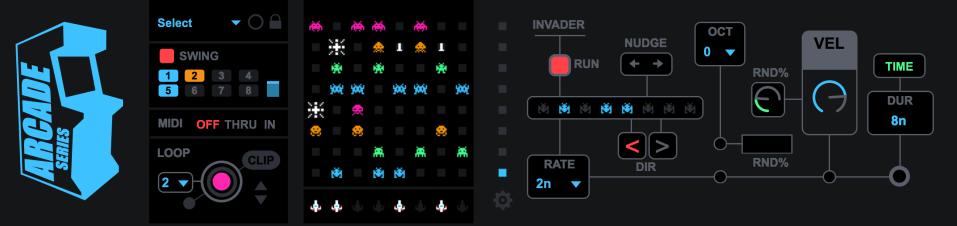
 When using a supported MPE controller, any incoming MPE slide and pressure values generated by each note are used to control either the octave range or duration of an individual note in the arpeggiated pattern. Slide and pressure can be assigned to either octave shift or note duration using the switch.
In it’s default mode:
More pressure applied to a note = longer individual note

Sliding up a note = higher octave shifts for the note
Standard arpeggiated patterns are available via the ‘Style’ menu and the maximum octave range of a pressed note can also be set using the ‘Max Oct’ parameter.
Step Sequencers
Arpex also features a step sequencer to control velocity and duration. If the velocity sequencer is active, incoming velocity values will be ignored, and instead generated by the velocity sequencer. This is a great way to maintain some consistency whilst jamming on with the device. Preset shapes are also available for the velocity sequencer to quickly dial in some common velocity patterns. These shapes will be applied only to the number of steps currently set for the sequencer.

If the duration sequencer is active, any MPE control data currently assigned to duration will be ignored and instead generated by the duration sequencer. Setting a duration sequencer step to maximum will result in an overlapping note (legato).

Each step in the sequencer can be turned off or on via the step buttons below the sequencers allowing for rhythmic variations to be applied to the arpeggiated pattern.
Both the velocity and active steps can be randomised momentarily or at the end of each loop of the sequencer.
Rate, Swing, Restart and Thru
 The arpeggiated pattern can be restarted so that it plays from the beginning and there are three different modes to control this:
OFF = the pattern is not restarted.
NOTE = the pattern is restarted every time a new note is played.
SEQ = the pattern is restarted every time the sequencer loops over.
The speed the arpeggiator runs at can be either synchronised to Live’s BPM at a user defined rate or set to run freely. Swing can also be applied if ‘Rate’ is set to ‘Sync’ and is either a 1/8, 1/16 or 1/32 note division.
By default, any incoming MPE control data (slide, pressure, pitch bend etc.) is essentially hijacked and used to control the device. It is possible to pass incoming MPE data ‘Thru’ to the output as well as controlling the device, meaning that any MPE routing on an instrument will resume.
How was it built?
Arpex was built in Max for Live and uses the mpeparse object to separate incoming MPE data, the poly~ object is then used to host each channel’s data.

This is how the information generated by an MPE controller can be organised, tagged and then reused within the device.
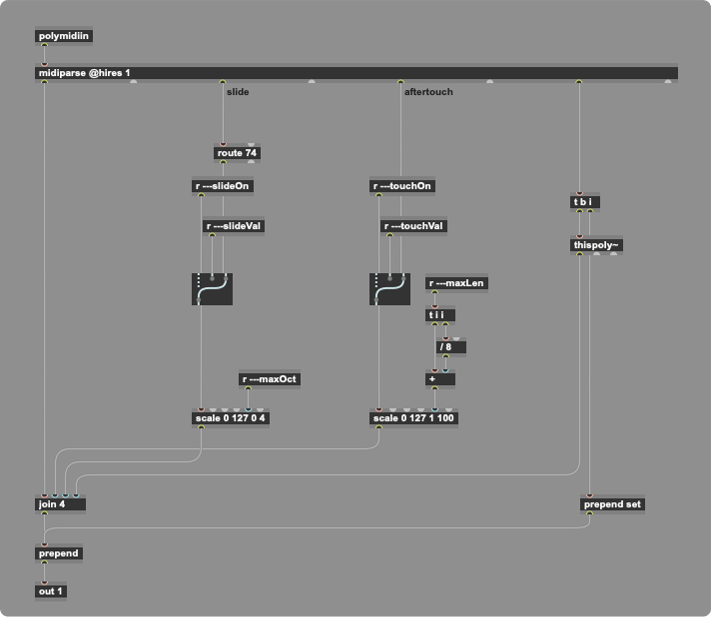
The main operation behind the device is based on temporarily storing incoming values (pitch, velocity, slide, aftertouch and channel) in the coll object, then outputting them at specific intervals.

The notes and velocity are essentially unchanged but the slide and aftertouch values are used to control either the octave transposition or the duration of outputted notes.
MPE Compatible Controllers
Ableton Push – Although not an MPE control surface, Push does have polyphonic aftertouch which means you can use individual pad pressure to control one of Arpex’s parameters (octave shift/note duration).
To enable polyphonic aftertouch: on Push 1, hold down the ‘User’ button, on Push 2, press ‘Setup’ and change the aftertouch option from ‘Mono‘ to ‘Polyphonic‘.
Links
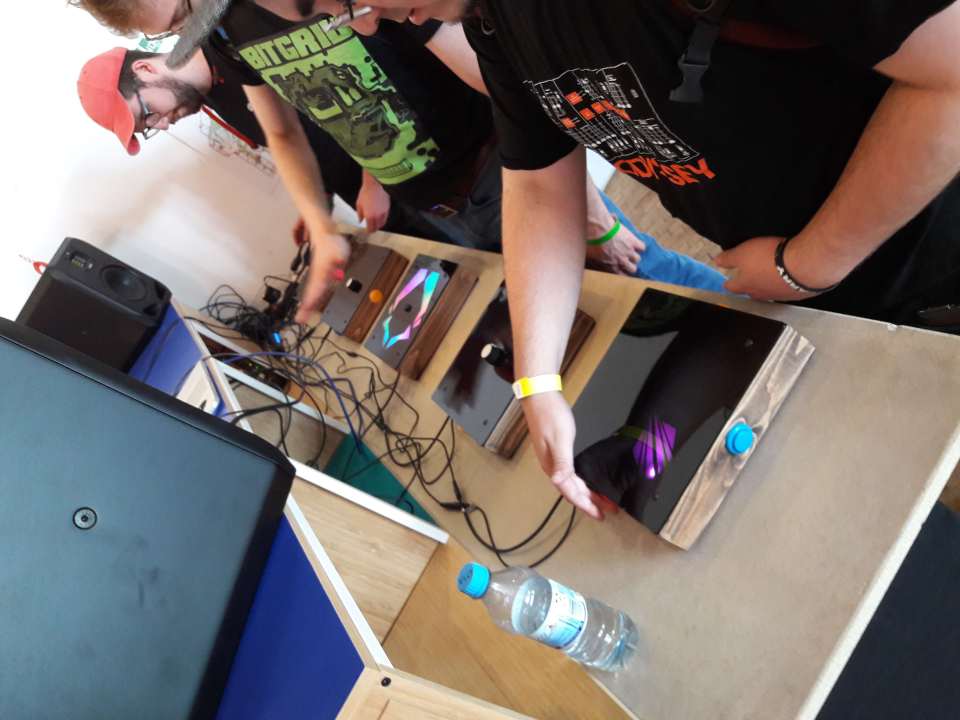
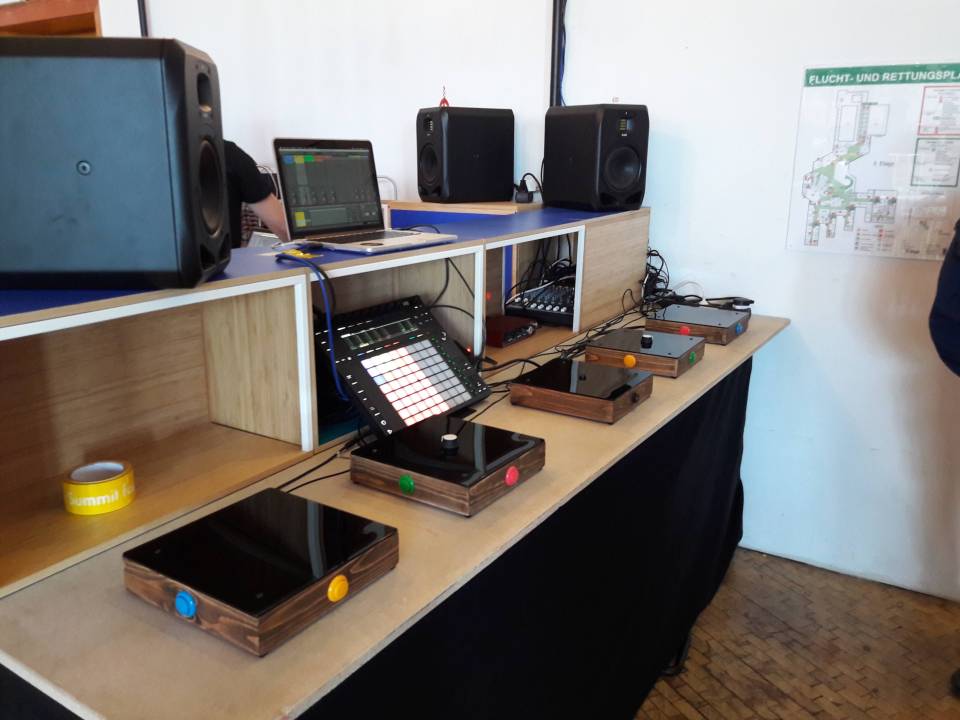
 New versions of the MINI PRZM’s are now ready and out in the world. Based on the same technology as the original PRZM, each player now controls their own mini PRZM instrument. Four of the devices have four arcade style buttons located on each side and control a specific instrument or musical layer (drums, bass, chords etc.). The final device has proximity and ultrasonic sensors that react to hand gestures and control master effects.